Bank Draft Processing
Welcome to the New World ERP Bank Draft Processing online guide. This guide will walk you through both the setup and processing aspects of Utility Bank Drafts.
The guide is organized into two sections.
The System Administration section will focus on the set-up components necessary to utilize Bank Draft Processing within New World ERP. This will include detailed information on “master files” that must be set-up such as the ACH export configuration, and will also include the security settings which will be utilized to enable workflow and tailor user options to your needs.
The End User Processing section will describe the steps, workflow and options available in Bank Draft Processing to the end-user. It will guide you through the process from Calculating Bank Drafts, to creating and sending the ACH file to your bank. Included in the section will be a guide to the standard reports available in the software.
System Administration Guide
Bank Drafting Setup
The maintenance setup that will need to be completed is as follows:
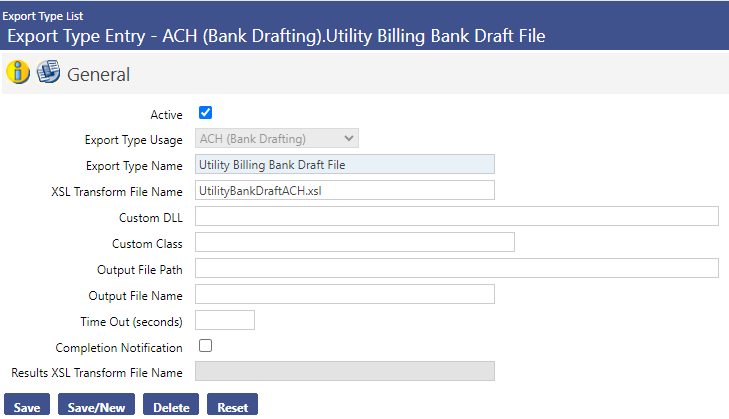
Maintenance > new world ERP Suite > System > Import/Export > Export Type List. Click the New button.
In the Export Type Usage field, select ACH (Bank Drafting)
The Export Type Name field will display during Bank Draft Processing
The XSL Transform File Name shown above should be used as a default, unless customization is done for the bank draft export.
Security Set-Up
Security for the Bank Draft Processing is solely through Application Permissions; there is no User Based Security or Process Manager set up required.
User Security / Application Permissions
The Bank Drafting feature group is shown below:
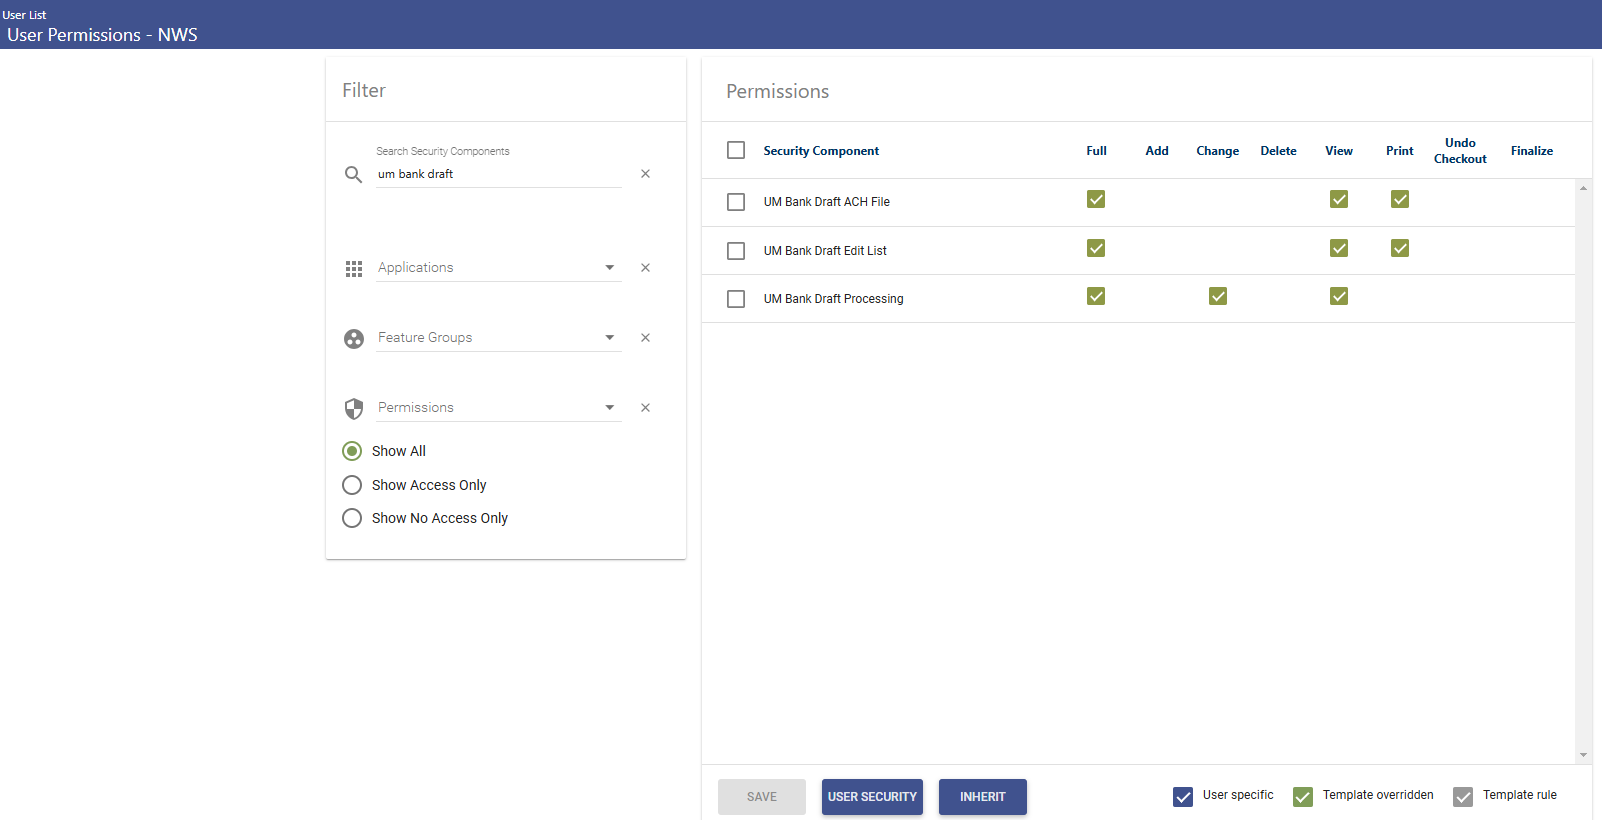
Maintenance > new world ERP Suite > Security > Users
|
Component |
Description |
|---|---|
|
UM Bank Draft ACH File |
Provides the ability to create a bank draft file for submission to the bank |
|
UM Bank Draft Edit List |
Allows the user to run an edit listing report during bank draft processing |
|
UM Bank Draft Processing |
Allows the user access to the processing module |
End User Processing Guide
Customer Service Entry
Bank Drafting will be entered and maintained at the account level in Customer Service:
Navigate to the Utility Account and access the Bank Drafting page:
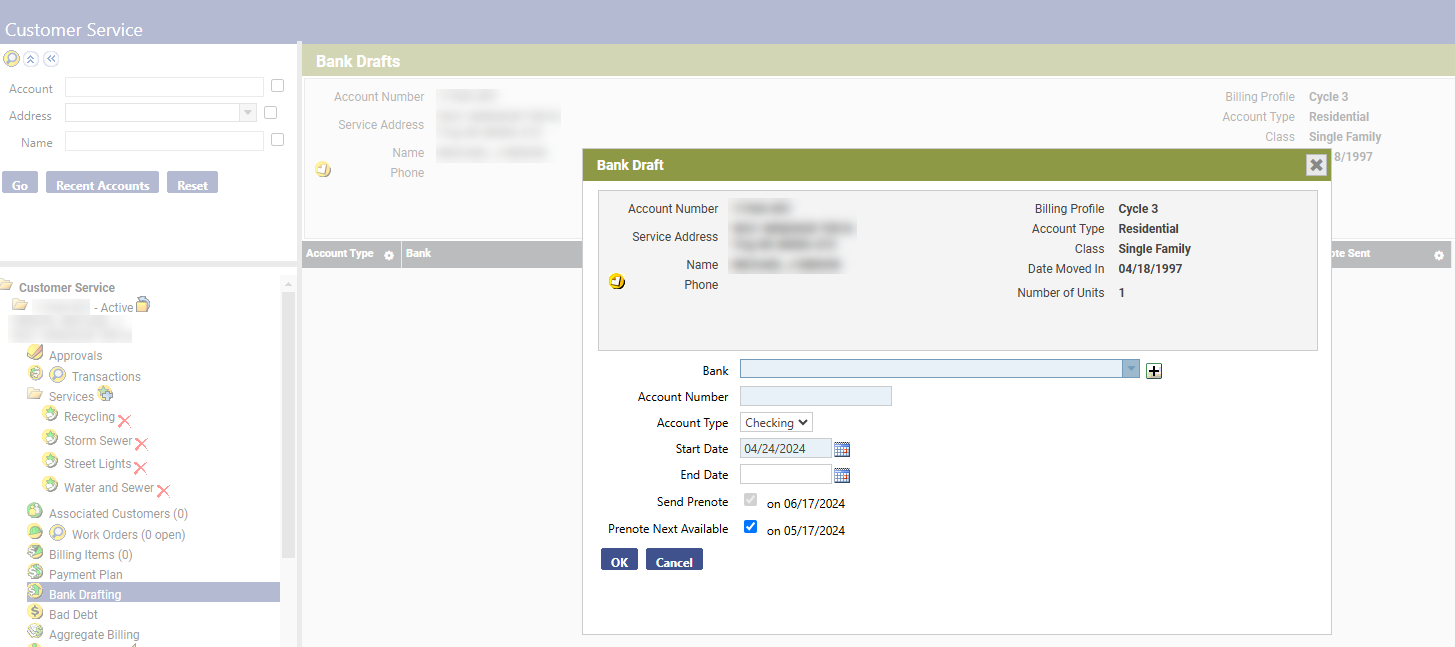
Clicking the New button will generate a pop-up window, allowing bank information to be entered. (The Delete button can be used to remove a bank drafting entered in error, provided that the bank draft has not been processed)
On the pop-up screen:
Enter the Bank information, Account Number, and Account Type. The start date can be changed if necessary, but is typically left at the default of today’s date.
The Send Prenote check box will cause the account to be prenoted the next time the billing cycle the account belongs to is run; after the prenote has been sent, the account will be included in bank drafting.
The Prenote Next Available check box will set the account up to be prenoted the next time any billing cycle is bank drafted.
Leaving both boxes unchecked will start the account bank drafting immediately when the billing cycle the account is in is processed.
The End Date field will be used when the customer desires to stop Bank Drafting; at this point, the user will click on the account number hyperlink and enter an end date.
Bank Draft Submission
Utility Management > Bank Drafting
When cycle billing is processed, appropriate Bank Draft accounts will be included for processing; these accounts will appear in a batch format to be maintained and submitted to the bank.
At the appropriate time, navigate to this page to start the Bank Drafting process. Note the summary information shown on this screen.
Click the Calculate button. After the screen refreshes, proceed to the next workflow bubble.
The Edit Listing page will display a list of all accounts to be included in bank drafting.
Several options are available within the grid on this page:
- Clicking the Print button will generate an edit listing report.
- Highlighting a row and clicking the Delete button will remove the account from the current bank draft only
- Clicking on the dollar figure in the Amount column will allow changes to the amount being bank drafted
- If the account has a special status (payment plan, prenote, etc.) an icon will display in the Status column. Hover over this icon for more information
The system will typically bank draft the entire amount due on the account. However, there are notable exceptions to this rule, such as payment plan accounts, budget billing accounts, and accounts that have had activity between billing and bank drafting, that should be reviewed when processing bank drafts.
Click on the Show Search link in the upper right of the screen.
This will display the search functions, enabling the user to select certain criteria; at the very minimum, a search by Balance Variance and a review of the accounts with variances should be completed before drafts are processed.
When maintenance and review have been completed, proceed to the Create ACH File workflow bubble.
- Select the appropriate Export File Type from the drop down menu
- If the bank requires an Offsetting ACH entry to be included in the file, check the box next to that setting
- Click the Submit button to send the ACH file to myReports
- From myReports, the ACH file can be downloaded and submitted to the bank
After receiving confirmation that the Bank has received the file, navigate to the Post workflow bubble.
Click the Post button. The Bank Draft payment will be finalized on the Utility Account, and a Journal will be sent to the Finance Department.